Quickstart Onboarding Guide
AI-Guided Agent Creation
Navigable AI's onboarding agent helps you create a fully trained and evaluated AI assistant in minutes - just by providing a link to your documentation. Here's how it works:
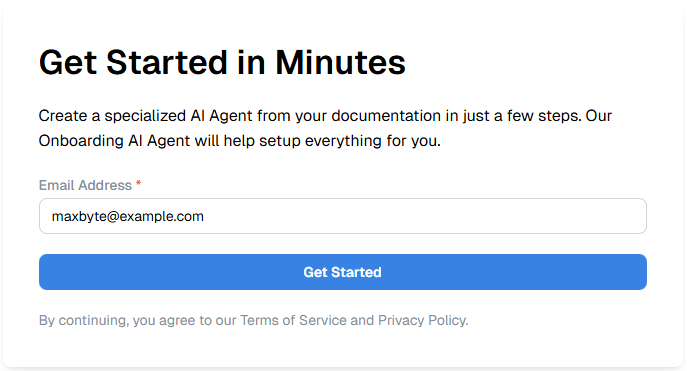
Step 1: Get Started
-
Navigate to the Navigable AI onboarding page
-
Enter your email address in the Email Address field
-
Click the Get Started button
-
Review and agree to the Terms of Service and Privacy Policy
What happens next: You'll receive an email verification link to confirm your account.
Step 2: Tell Us About Your Product
Once your email is verified, you'll be taken to the product information page.
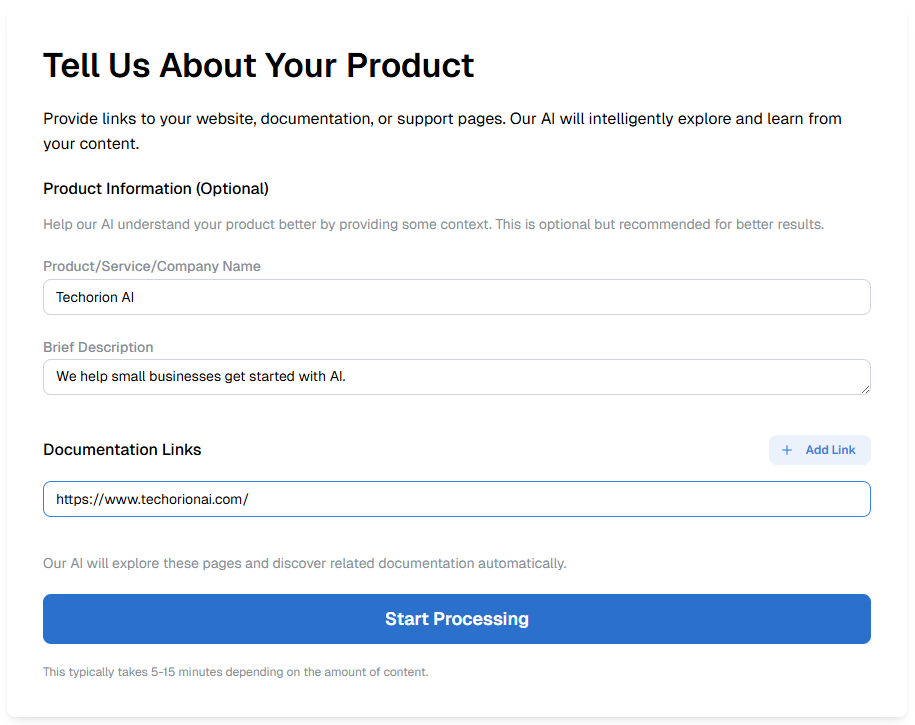
Product Information (Optional but Recommended)
Provide context to help the AI better understand your product:
- Product/Service/Company Name: Enter your product or company name (e.g., "Techorion AI")
- Brief Description: Add a short description of what your product does (e.g., "We help small businesses get started with AI")
Documentation Links
- In the Documentation Links section, paste the URL to your support documentation, help center, or website
- Click + Add Link if you need to add multiple documentation sources
- The AI will automatically explore these pages and discover related documentation
Note: The onboarding agent will intelligently crawl and extract content from the provided links.
You can add only links from the same domain (e.g., all links must be from yourcompany.com).
Start Processing
- Review your information
- Click Start Processing
- Processing time: This typically takes 5-15 minutes depending on the amount of content
Step 3: AI Agent Building Process
Once you click "Start Processing," the onboarding agent takes over and begins building your AI assistant automatically.
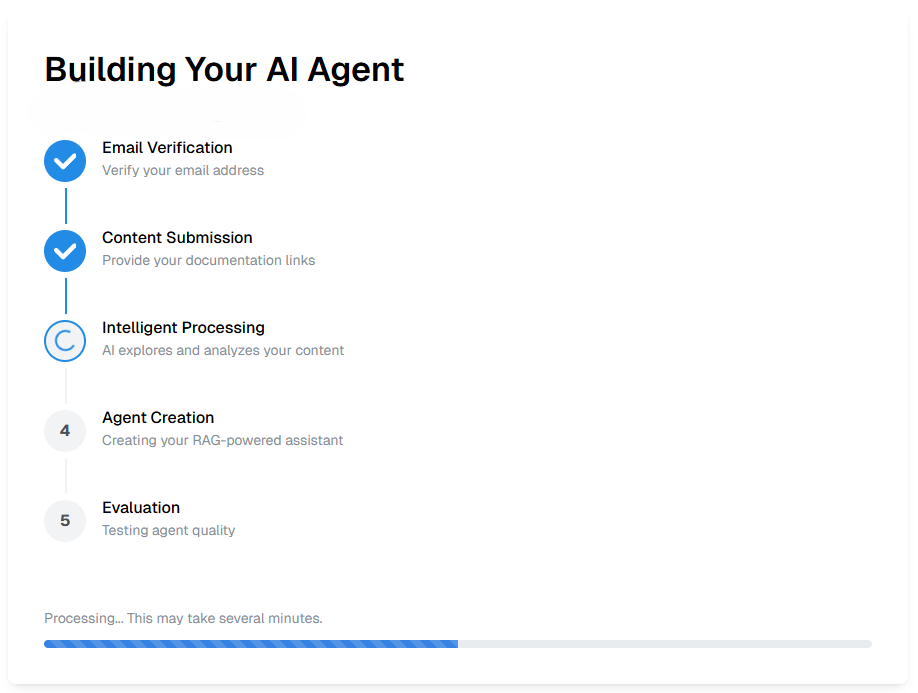
You'll see a progress tracker with the following steps:
✓ Step 1: Email Verification
Your email address is verified and confirmed.
✓ Step 2: Content Submission
Your documentation links have been received and queued for processing.
⏳ Step 3: Intelligent Processing
The AI explores and analyzes your content, extracting key information, product features, and support knowledge.
Status: "AI explores and analyzes your content"
⏳ Step 4: Agent Creation
Your RAG-powered assistant is being created using the extracted and structured knowledge.
Status: "Creating your RAG-powered assistant"
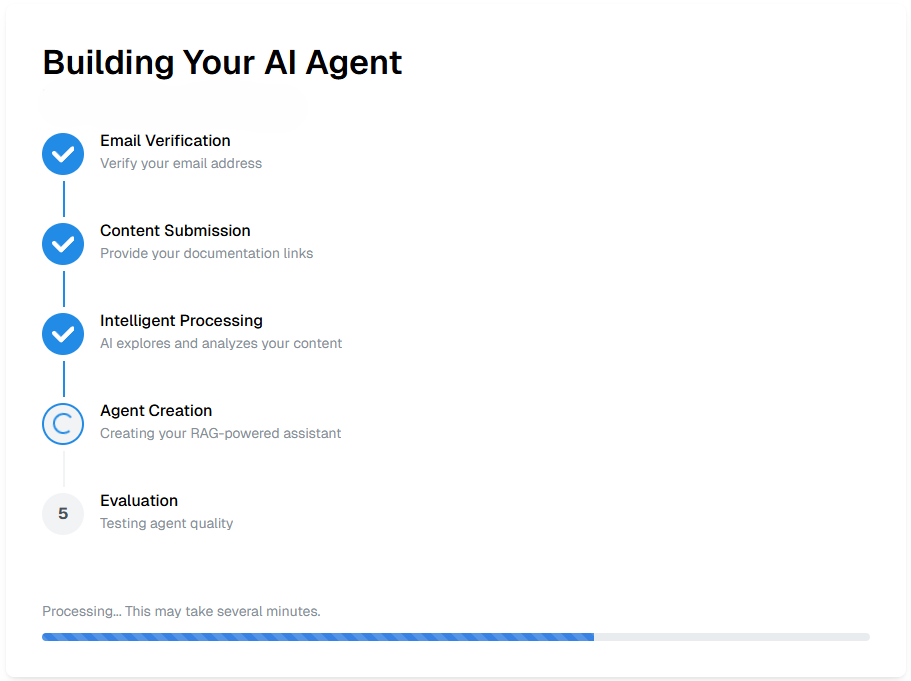
⏳ Step 5: Evaluation
The system automatically tests your agent's quality and accuracy against a generated test set.
Status: "Testing agent quality"
Progress indicator: A progress bar shows the current status of the build process.
Step 4: Agent Ready & Evaluation Complete
Once all steps are complete, you'll see a success message:
"Success! Your AI agent is ready! Evaluation Score: 94.67"
All five steps will show checkmarks:
- ✓ Email Verification
- ✓ Content Submission
- ✓ Intelligent Processing
- ✓ Agent Creation
- ✓ Evaluation

Your AI Agent is Ready!
You'll see:
- Evaluation Score displayed prominently (e.g., 94.67 in a green badge)
- Two action buttons:
- Test Your Agent
- Create Another Agent
Email Notification
You'll receive an email notification with:
- Confirmation that your agent is ready
- Your evaluation score
- A direct link to access your agent in the Navigable AI dashboard
Check your spam/junk folder if you don't see the email in your inbox. Consider adding [email protected] to your contacts.
Step 5: Review Evaluated Responses
Click Test Your Agent or use the link in your email to access your agent's dashboard.
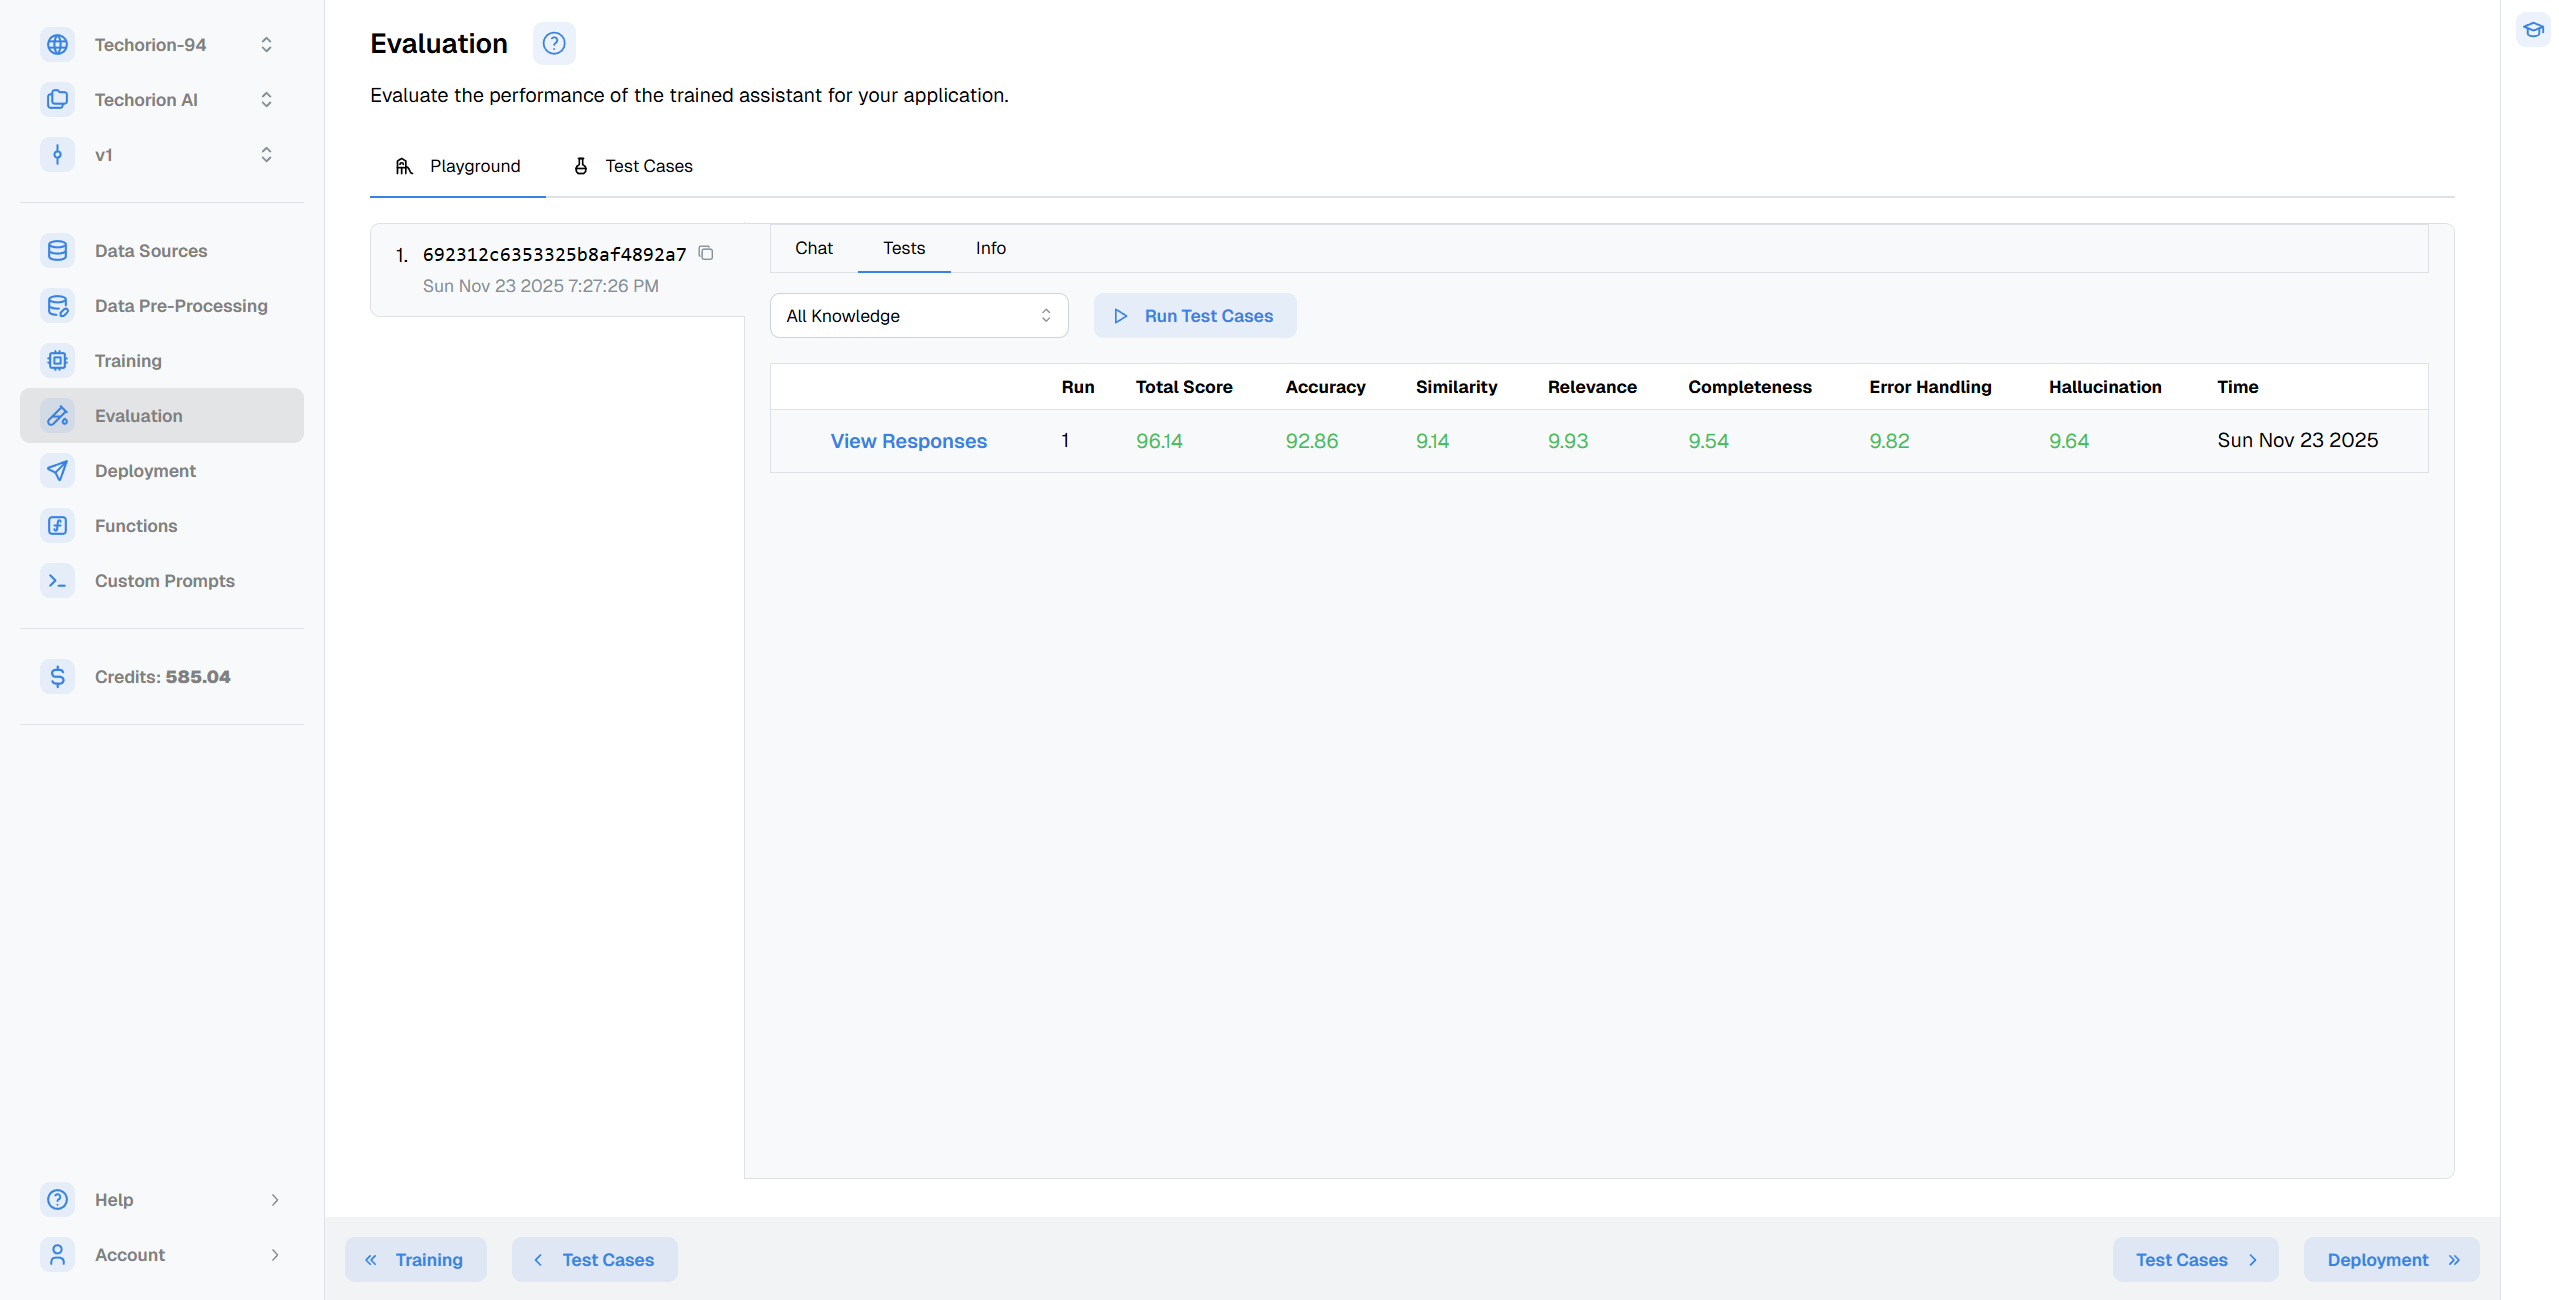
What You Can Do
-
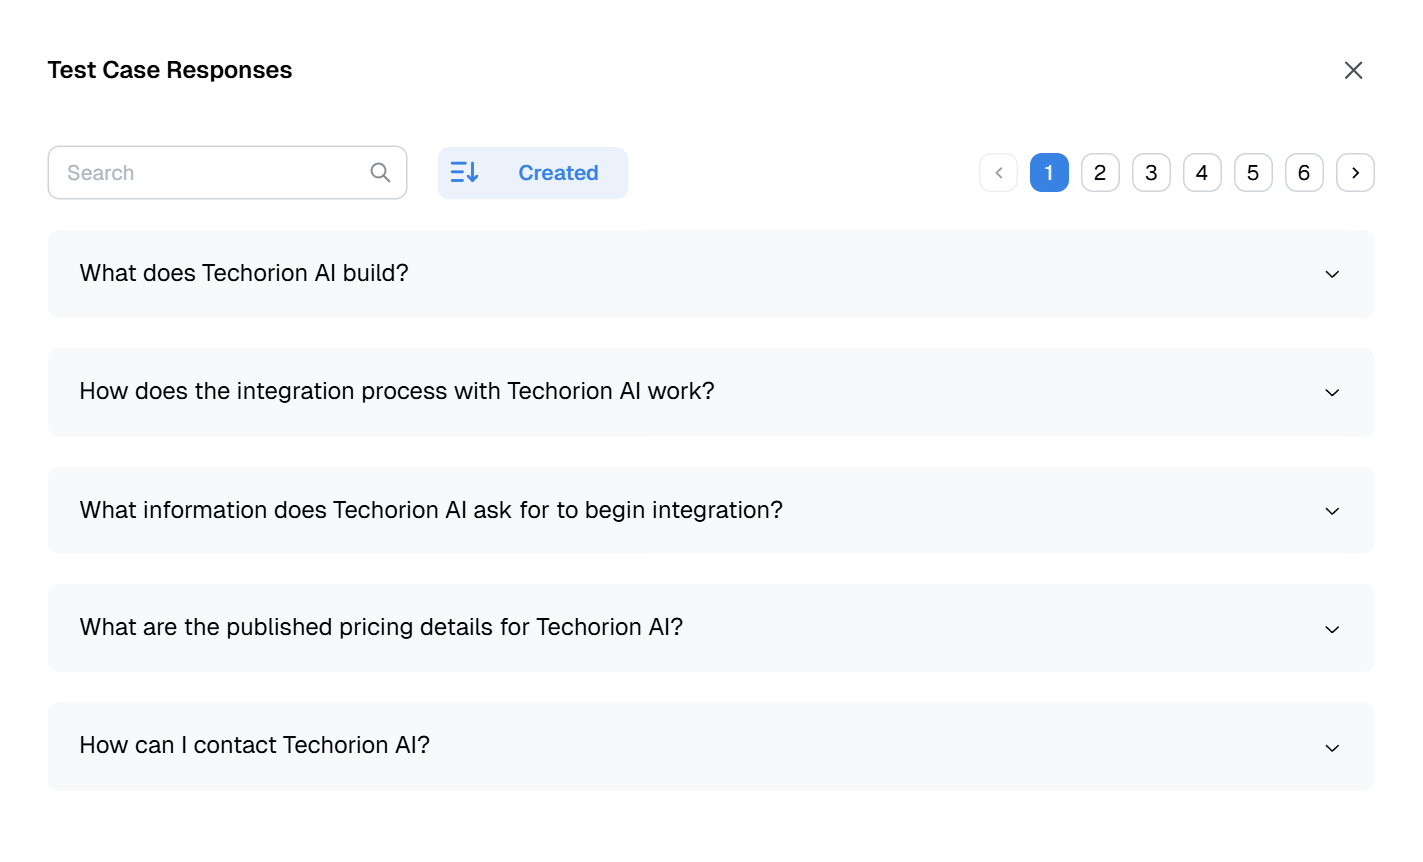
View Evaluated Responses
Click on the View Responses button to see detailed results from the automated evaluation.
- Review the automated test results
- See how your agent performed on various sample queries
- Identify any areas that may need refinement
-
Test Live in Playground
Click on the Chat tab to interact with your agent in real-time.
- Ask your agent questions in real-time
- Test edge cases and specific scenarios
- Verify that responses match your product knowledge
- Refine and adjust as needed

-
Review Agent Configuration
- Check the training data used
- Review extracted knowledge
- Make manual adjustments if desired
Step 6: Choose a Plan and Deploy
Once you're satisfied with your agent's performance:
-
Select a Paid Plan
Click on the Credits button on the middle left to view available plans. Follow the steps to choose and subscribe to a plan.
- Choose the plan that fits your usage needs
- Plans scale with your business
-
Deploy Your Agent
Click on the Deploy tab to access deployment options. Follow the steps to create an API key and set up your agent.
- Integrate via Chat Widget for instant deployment on your website. Use our Chat Widget Builder to easily customize and embed the chat interface.
- Use the Chat API for custom integrations
- Configure agent behavior and actions
- Set up navigation suggestions and automation
-
Go Live
- Your verified, product-aware agent is ready to assist users
- Monitor performance and chat history from your dashboard
- Iterate and improve based on real user interactions
What Makes This Process Different?
- No manual data preparation: Just provide a link
- Automatic training data generation: AI extracts and structures everything
- Built-in evaluation: Quality is verified before deployment
- Fast: From docs to deployed agent in under 15 minutes
- Trustworthy: Every agent is tested and scored for accuracy
Need Help?
If you encounter any issues during onboarding or have questions about your agent:
- Visit our documentation
- Contact support through our portal, or reach out to us via email at [email protected]
- Check out our blog for best practices
Ready to get started? Create your first AI agent now